
1.System Overview
MTS system is a tool that assists elevator installation and maintenance work through computers. It provides a series of effective query and diagnosis functions, making installation and maintenance work more convenient and faster. This system consists of Maintenance Tools Interface (hereinafter referred to as MTI), USB cable, parallel cable, general network cable, cross network cable, RS232, RS422 serial cable, CAN communication cable and portable computer and related software. The system is valid for 90 days and needs to be re-registered after expiration.
2. Configuration and Installation
2.1 Laptop Configuration
In order to ensure the normal operation of the program, it is recommended that the laptop computer used adopt the following configuration:
CPU: INTEL PENTIUM III 550MHz or above
Memory: 128MB or above
Hard disk: no less than 50M usable hard disk space.
Display resolution: no less than 1024×768
USB: at least 1
Operating system: Windows 7, Windows 10
2.2 Installation
2.2.1 Preparation
Note: When using MTS in Win7 system, you need to go to [Control Panel - Operation Center - Change User Account Control Settings], set it to "Never notify" (as shown in Figures 2-1, 2-2, and 2-3), and then restart the computer.
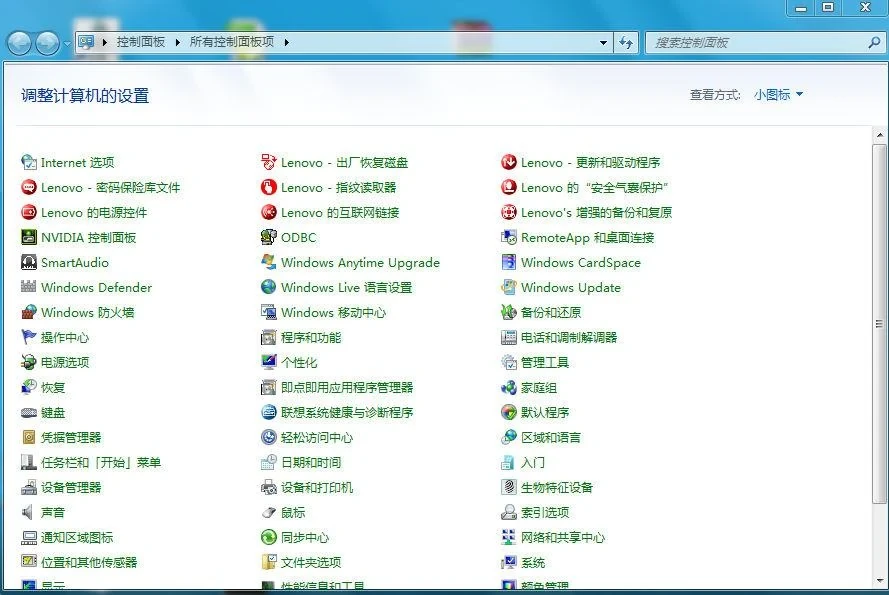
Figures 2-1
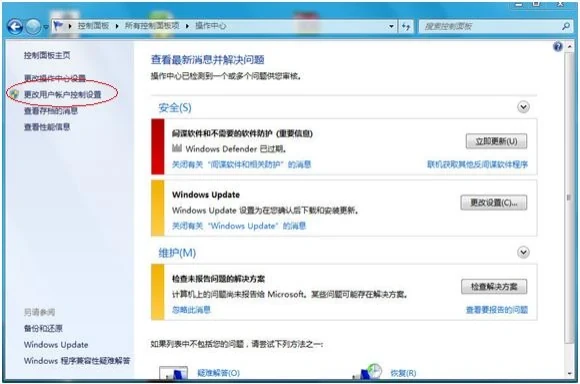
Figures 2-2
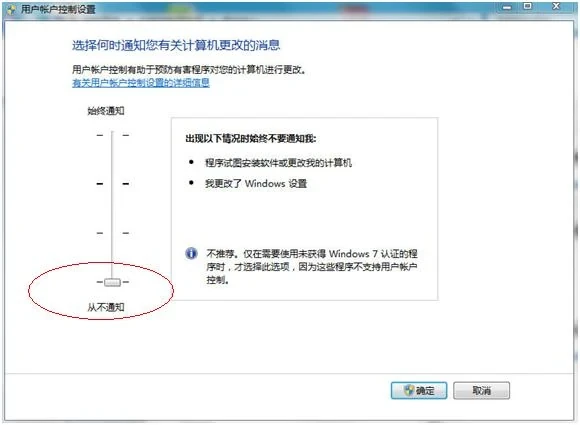
Figures 2-3
2.2.2 Obtaining the registration code
The installer must first execute the HostInfo.exe file and enter the name, unit, and card number in the registration window.
Press the Save key to save all information in a document selected by the installer. Send the above document to the MTS software administrator, and the installer will receive a 48-digit registration code. This registration code is used as the installation password. (See Figure 2-4)
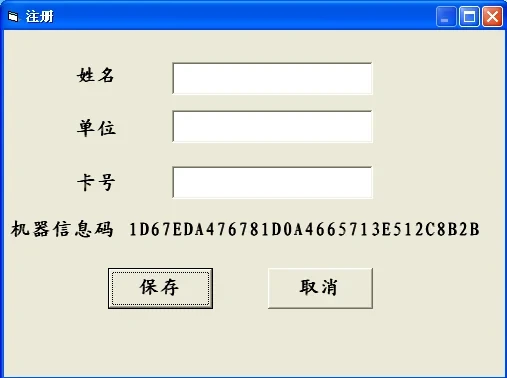
Figure 2-4
2.2.3 Install USB driver (Win7)
First generation MTI card:
First, connect MTI and PC with USB cable, and turn RSW of MTI to "0", and cross-connect pins 2 and 6 of MTI serial port. Make sure the WDT light of MTI card is always on. Then, according to the system installation prompt, select WIN98WIN2K or WINXP directory in the DRIVER directory of the installation disk according to the actual operating system. After the installation is complete, the USB light in the upper right corner of MTI card is always on. Click the safe hardware removal icon in the lower right corner of PC, and Shanghai Mitsubishi MTI can be seen. (See Figure 2-5)

Figures 2-5
Second generation MTI card:
First rotate SW1 and SW2 of MTI-II to 0, and then use a USB cable to connect MTI
and PC. If you have installed the second generation MTI card driver of MTS2.2 before, first find Shanghai Mitsubishi Elevator CO.LTD, MTI-II in Device Manager - Universal Serial Bus Controllers and uninstall it, as shown in Figure 2-6.
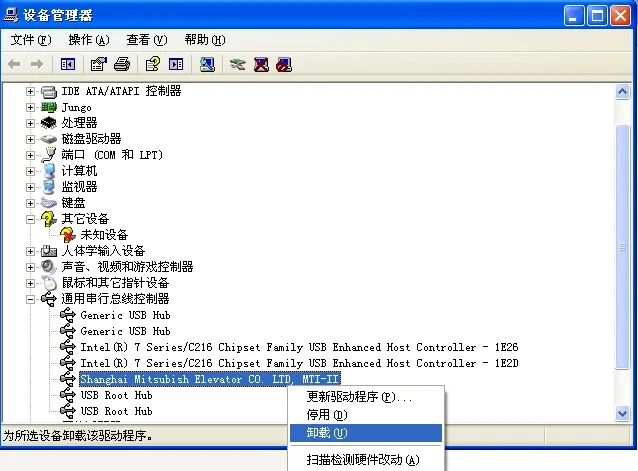
Figures 2-6
Then search for the .inf file containing "Shanghai Mitsubish Elevator CO. LTD, MTI-II" in the C:\Windows\Inf directory and delete it. (Otherwise, the system cannot install the new driver). Then, according to the system installation prompt, select the DRIVER directory of the installation disk to install. After the installation is complete, Shanghai Mitsubishi Elevator CO.LTD, MTI-II can be seen in System Properties - Hardware - Device Manager - libusb-win32 devices. (See Figure 2-7)
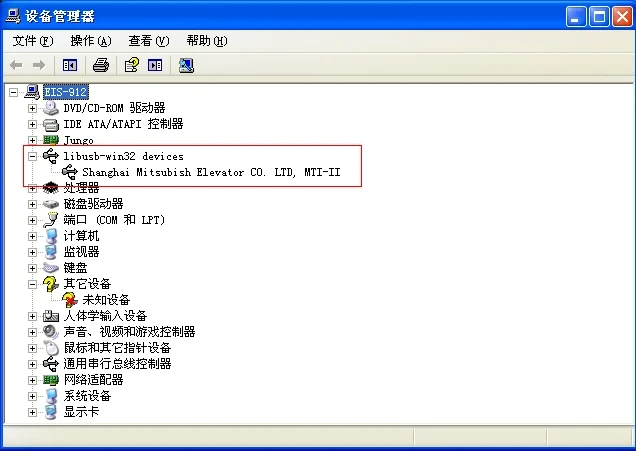
Figures 2-7
2.2.4 Install USB driver (Win10)
Second generation MTI card:
First, rotate SW1 and SW2 of MTI-II to 0, and then use a USB cable to connect MTI and PC. Then configure "Disable mandatory driver signature", and finally install the driver. The detailed operation steps are as follows.
Note: If the MTI card is not recognized, as shown in Figure 2-15, it means that it has not been configured - disable mandatory driver signature. If the driver cannot be used, as shown in Figure 2-16, re-plug the MTI card. If it still appears, uninstall the driver and reinstall the MTI card driver.
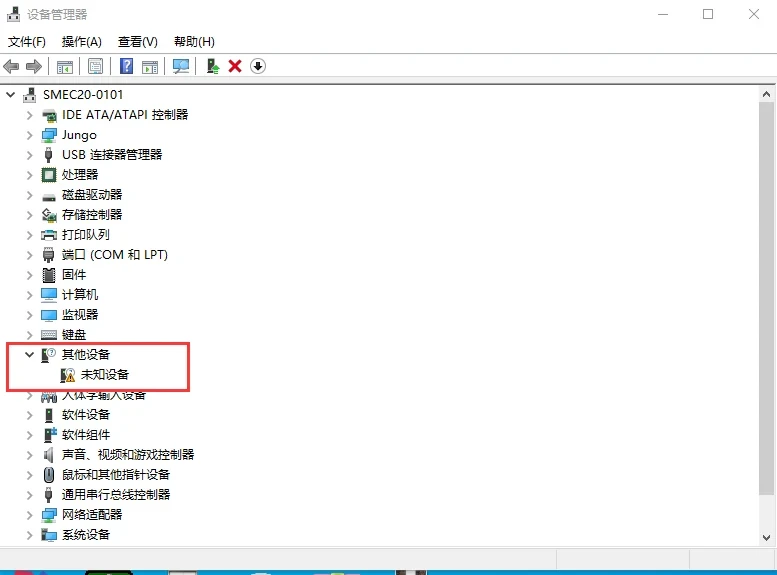
Figure 2-15
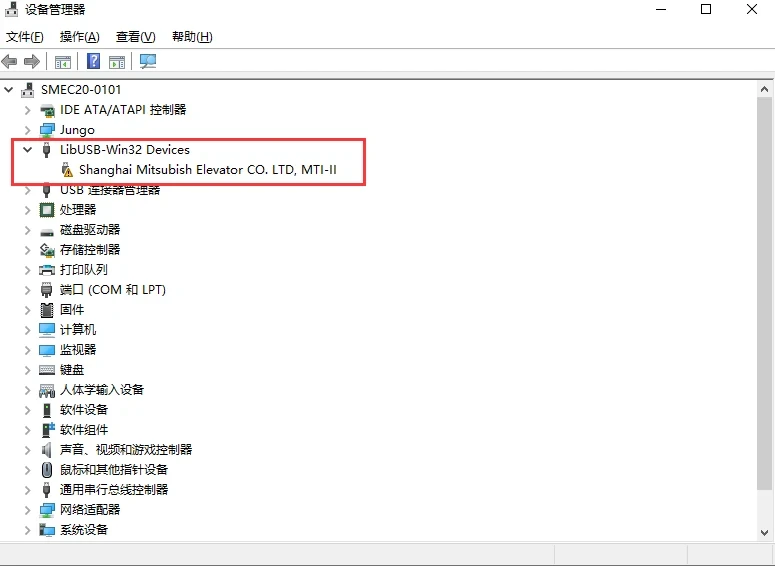
Figure 2-16
Disable mandatory driver signature (tested and configured once on the same laptop):
Step 1: Select the information icon in the lower right corner as shown in Figure 2-17, and select "All Settings" as shown in Figure 2-18
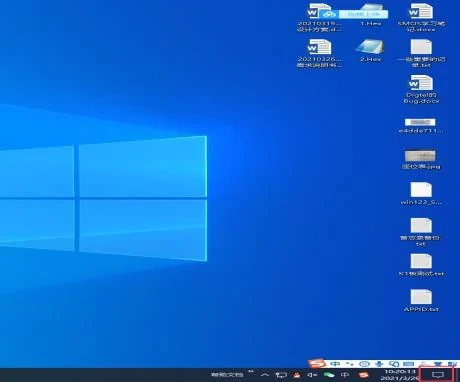
Figure 2-17
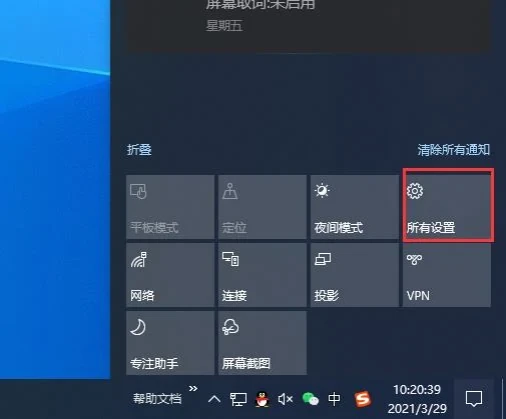
Figure 2-18
Step 2: Select "Update and Security" as shown in Figure 2-19. Please save this document to your phone for easy reference. The following steps will restart the computer. Please make sure that all files have been saved. Select "Restore" as shown in Figure 2-20 and click Start Now.
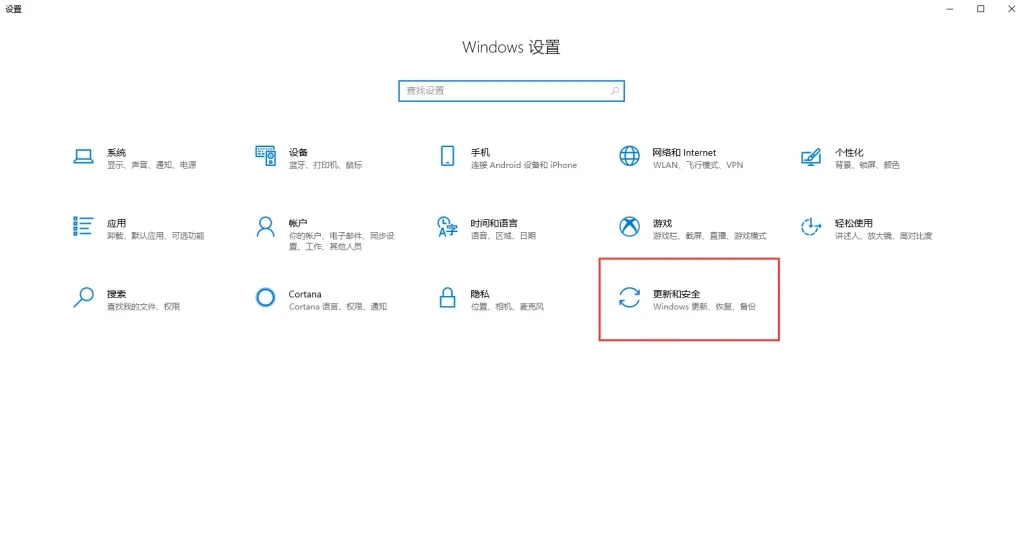
Figure 2-19
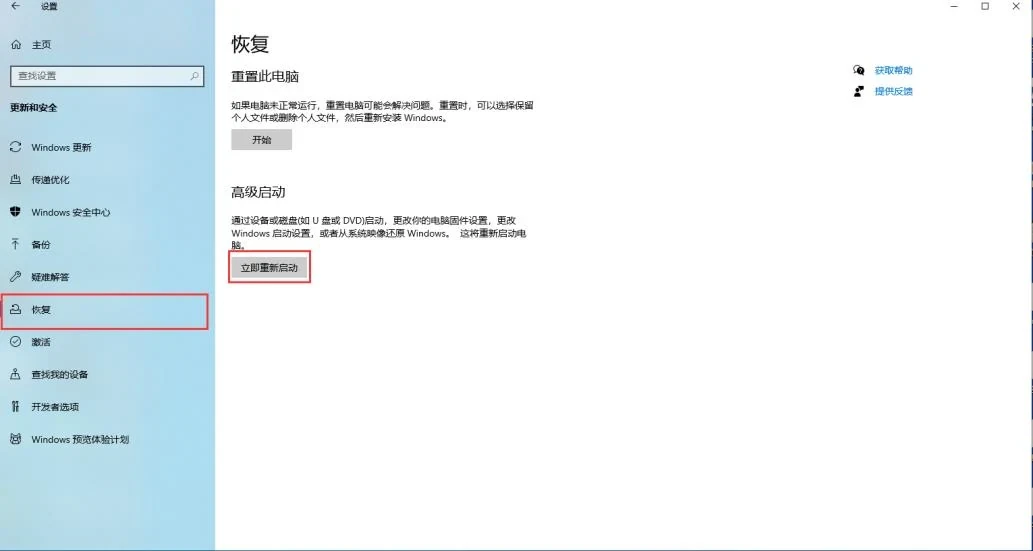
Figure 2-20
Step 3: After restarting, enter the interface as shown in Figure 2-21, select "Troubleshooting", select "Advanced Options" as shown in Figure 2-22, then select "Startup Settings" as shown in Figure 2-23, and then click "Restart" as shown in Figure 2-24.
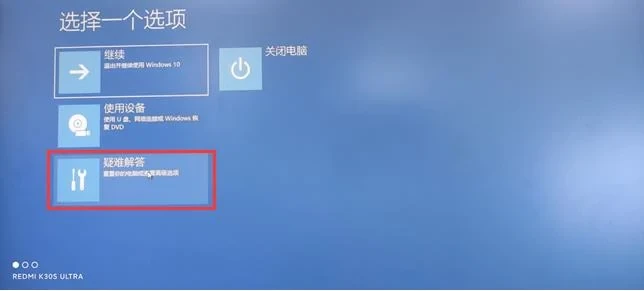
Figure 2-21
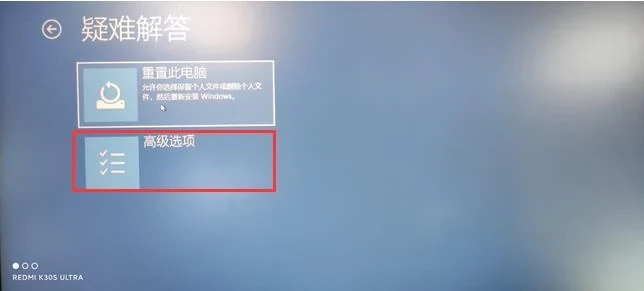
Figure 2-22
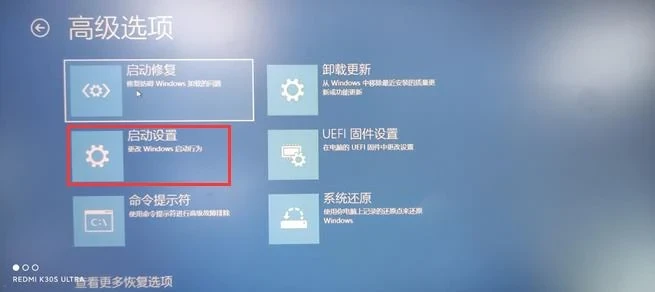
Figure 2-23
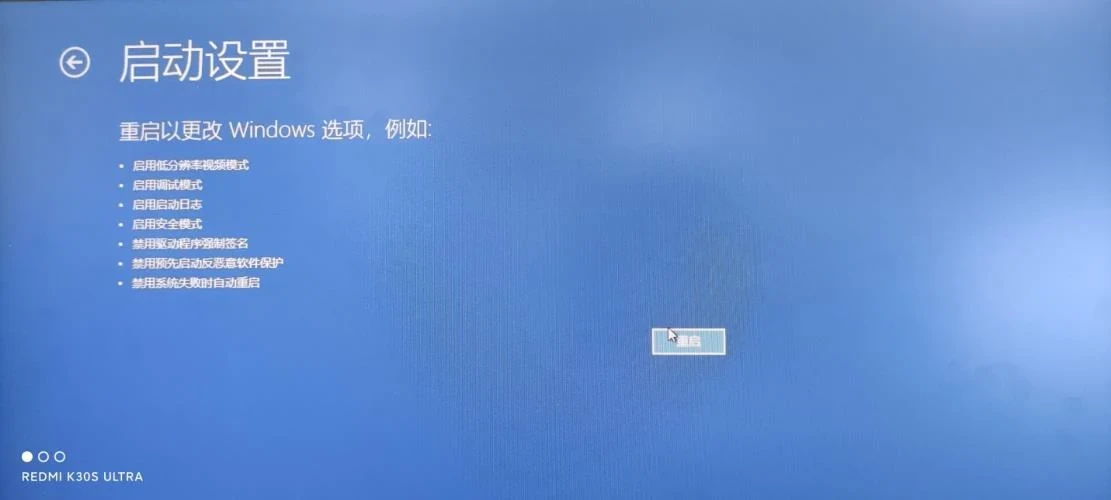
Figure 2-24
Step 4: After restarting and entering the interface as shown in Figure 2-25, press the "7" key on the keyboard and the computer will automatically configure.
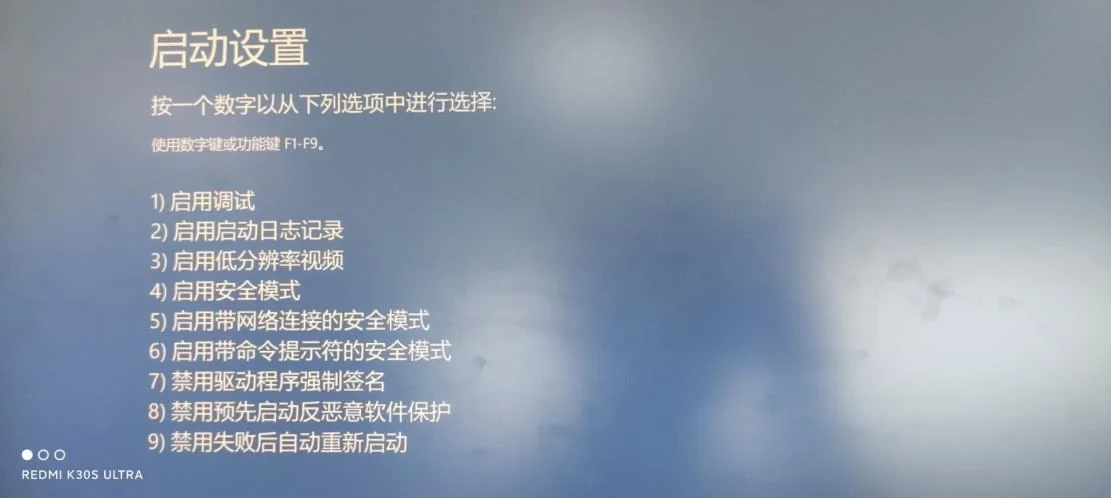
Figure 2-25
Install the MTI card driver:
Right-click Figure 2-26 and select Update Driver. Enter the interface of Figure 2-27 and select the directory where the .inf file of the driver "Shanghai Mitsubish Elevator CO. LTD, MTI-II" is located (the previous level is fine). Then follow the system prompts to install it step by step. Finally, the system may prompt an error message of "Parameter Error" as shown in Figure 2-28. Just shut it down normally and re-plug the MTI card to use it.
Figure 2-26
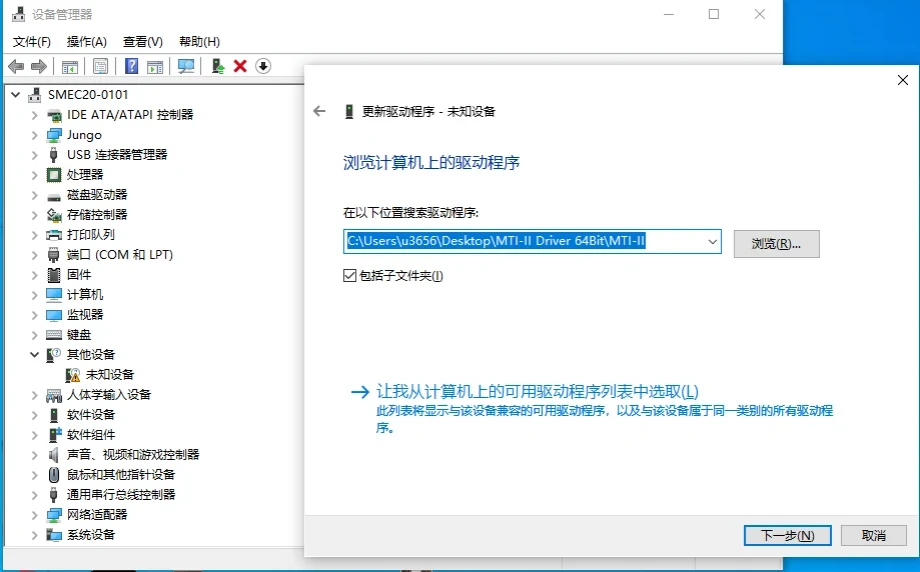
Figure 2-27
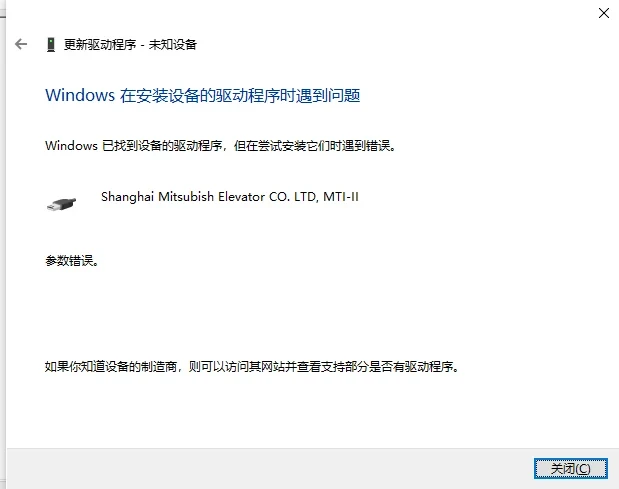
Figure 2-28
2.2.5 Install the PC program of MTS-II
(The following graphical interfaces are all taken from WINXP. The installation interfaces of WIN7 and WIN10 will be slightly different. It is recommended to close all WINDOWS running programs before installing this program)
Installation steps:
Before installation, connect the PC and the MTI card. The connection method is the same as installing the USB driver. Make sure the rotary switch is turned to 0.
1) For the first installation, please install dotNetFx40_Full_x86_x64.exe first (Win10 system does not need to be installed).
For the second installation, please start directly from 8). Run MTS-II-Setup.exe as an administrator and press the NEXT key in the Welcome window to the next step. (See Figure 2-7)
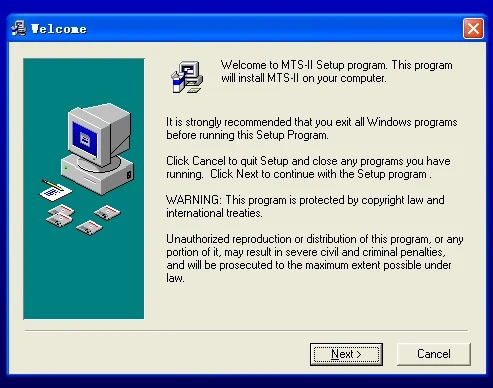
Figure 2-7
2) In the Choose Destination Location window, press the NEXT key to proceed to the next step; or press the Browse key to select a folder and then press the NEXT key to proceed to the next step. (See Figure 2-8)
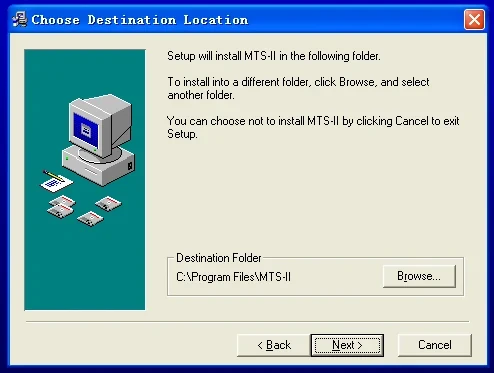
Figure 2-8
3) In the Select Program Manager Group window, press NEXT to proceed to the next step. (See Figure 2-9)
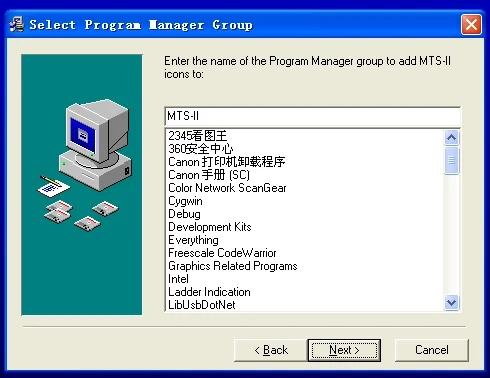
Figure 2-9
4) In the Start Installation window, press NEXT to start the installation. (See Figure 2-10)
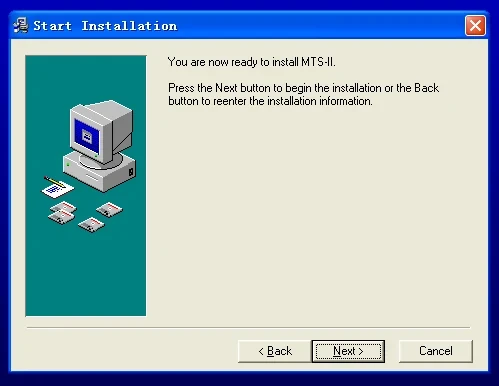
Figure 2-10
5) In the registration setting window, enter the 48-digit registration code and press the confirm key. If the registration code is correct, the "Registration Successful" message box will be displayed. (See Figure 2-11)
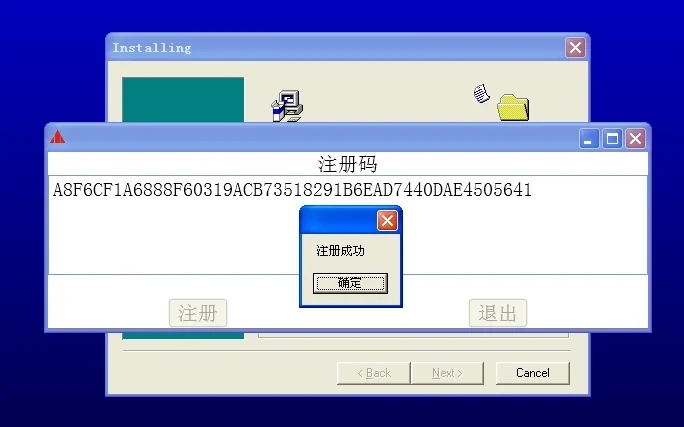
Figure 2-11
6) Installation is complete. See (Figure 2-12)
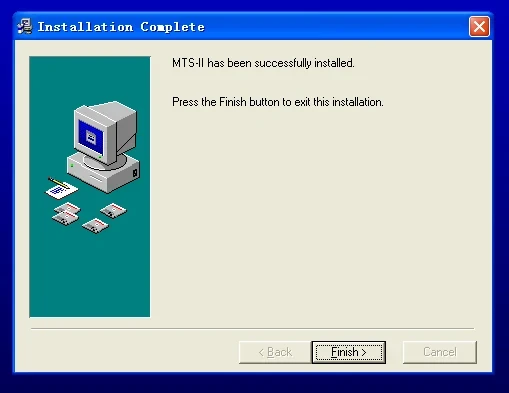
Figure 2-12
7) For the second installation, run Register.exe in the installation directory directly, enter the obtained registration code, and wait for the registration to succeed. See Figure 2-13.
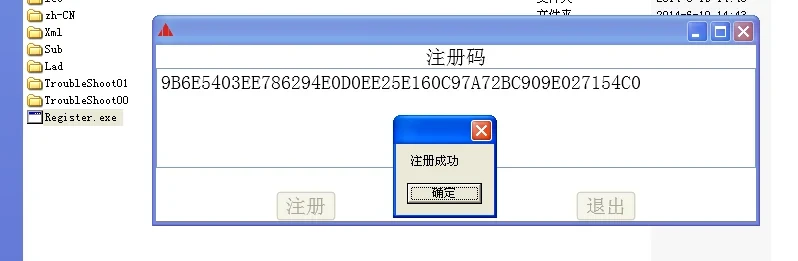
Figure 2-13
8) When the MTS-II expires for the first time, enter the correct password, click Confirm, and choose to extend the period for 3 days. See Figure 2-14.
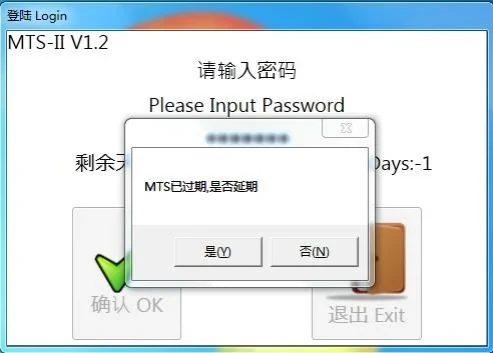
Figure 2-14
2.2.6 Re-register after MTS-II expires
1) If the following image is displayed after starting MTS, it means that MTS has expired.
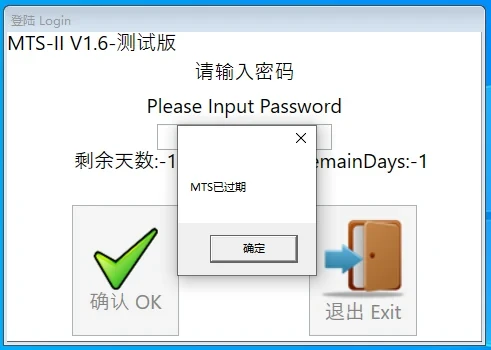
Figure 2-15
2) Generate a machine code through hostinfo.exe and reapply for a new registration code.
3) After obtaining the new registration code, copy the registration code, connect the computer to the MTI card, open the installation directory of MTS-II, find the Register.exe file, run it as an administrator, and the following interface will be displayed. Enter the new registration code and click Register.
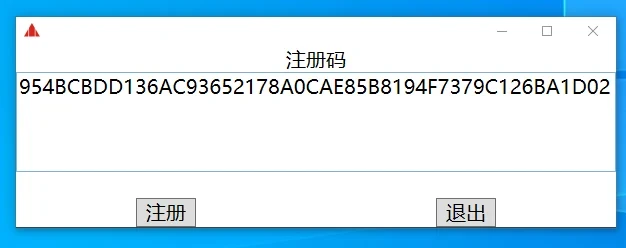
Figure 2-16
4) After successful registration, the following interface is displayed, indicating that the registration is successful, and the MTS-II can be used again with a 90-day usage period.
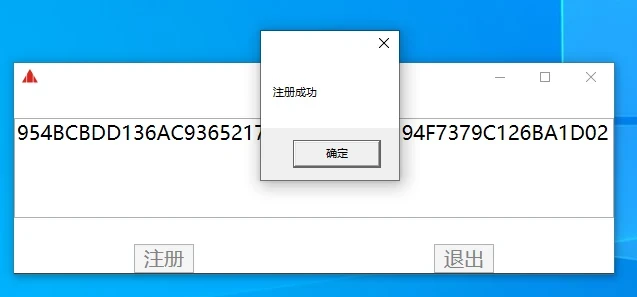
Figure 2-17


