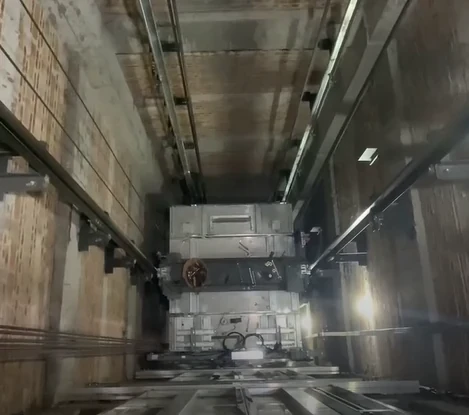
Elevator Landing Door Installation: Complete Guide to Door Sill, Door Panel, Door Lock and Roller Adjustment
The landing door is one of the most important mechanical and safety components of an elevator system.
A properly installed elevator landing door must move smoothly, close reliably, remain correctly aligned with the car door, and ensure that the elevator door lock operates correctly before the elevator is allowed to run.
During installation and commissioning, relatively small mechanical problems can create major operational symptoms, including:
- Door closing impact
- Door opening impact
- Door not fully opening
- Door not fully closing
- Elevator unable to run after the doors close
- Door noise or friction
- Door rebound
- Door lock not engaging
- Pickup roller and door clutch interference
- Door panel rubbing against the sill
The installation reference material emphasizes checking landing-door components such as the door sill, door panels, door lock and door rollers as part of installation quality inspection.

1. What Is an Elevator Landing Door?
An elevator landing door is the door installed at each floor entrance of the elevator shaft.
Unlike the car door, the landing door remains part of the building-side elevator installation. During normal operation, the car door mechanism engages with the landing door through a door coupling or pickup mechanism, allowing the two doors to open and close together.
A typical landing-door assembly may include:
- Door panel
- Door hanger
- Door roller
- Door guide
- Landing door sill
- Door lock/interlock
- Lock contact
- Lock release mechanism
- Door closing spring
- Pickup roller
- Door clutch or skate
- Mechanical fixing components
Each component affects the final door movement.
A problem that appears to be an electrical or controller fault may actually originate from mechanical resistance, incorrect clearance, door-panel alignment or an improperly adjusted elevator door lock.
2. Main Components of an Elevator Landing Door
2.1 Elevator Door Panel
The door panel is the visible moving part of the landing door.
During installation, the panel should be correctly positioned relative to:
- The landing sill
- The door header
- The adjacent panel
- The car door
- The door frame
The panel must not contact the sill or surrounding structure during movement.
If the door panel is not correctly aligned, the increased mechanical resistance can prevent the door from reaching its complete open or closed position.
2.2 Elevator Door Sill
The elevator door sill supports and guides the lower part of the landing door.
The sill should be:
- Correctly positioned
- Firmly fixed
- Clean
- Properly aligned
- Free from excessive deformation
- Free from foreign objects
A dirty or damaged sill can significantly increase door resistance.
The troubleshooting material specifically identifies excessive friction between the door guide shoe and sill, contact between the guide shoe and the bottom of the sill groove, and contact between the door panel and sill as possible causes of a door failing to open completely.
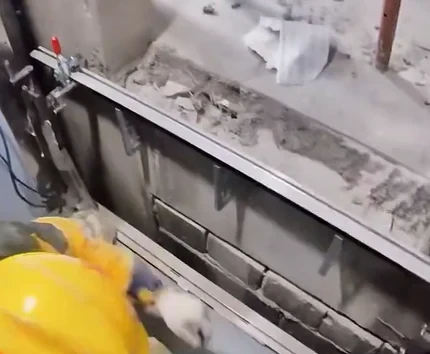
Important installation point
The sill should be checked before the door system is commissioned.
Remove:
- Dust
- Construction debris
- Metal particles
- Paint
- Cement
- Other foreign material
Then manually move the door panel and check whether the movement is smooth.
3. Elevator Door Roller and Hanger Installation
The door roller and hanger system allows the door panel to move along the upper guide system.
Incorrect roller adjustment can cause:
- Excessive friction
- Door vibration
- Abnormal noise
- Door closing impact
- Door opening failure
- Uneven door movement
The roller should guide the door without creating unnecessary resistance.
The reference troubleshooting material notes that an eccentric roller pressed too tightly against the guide rail can increase mechanical resistance and prevent the door from reaching the fully open position.
Recommended inspection procedure
After installing the door hanger:
- Check the roller position.
- Check the guide rail.
- Move the door manually.
- Confirm there is no abnormal friction.
- Check whether the panel moves evenly.
- Check the door panel-to-sill relationship.
- Check the closing spring.
- Check the belt or wire-rope tension where applicable.
The objective is not simply to make the door move, but to make it move smoothly and consistently.
4. Elevator Door Lock Installation
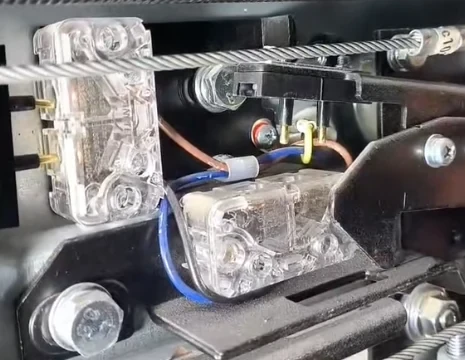
The elevator door lock is one of the most critical parts of the landing door system.
Its basic function is to ensure that the landing door is mechanically secured and that the corresponding electrical safety contact is correctly switched before normal elevator operation.
A typical failure can look like this:
The elevator doors appear to be closed, but the elevator does not run.
In the troubleshooting material, one such condition was caused by the landing-door interlock not being completely closed. Because the safety circuit remained open, the elevator could not run.
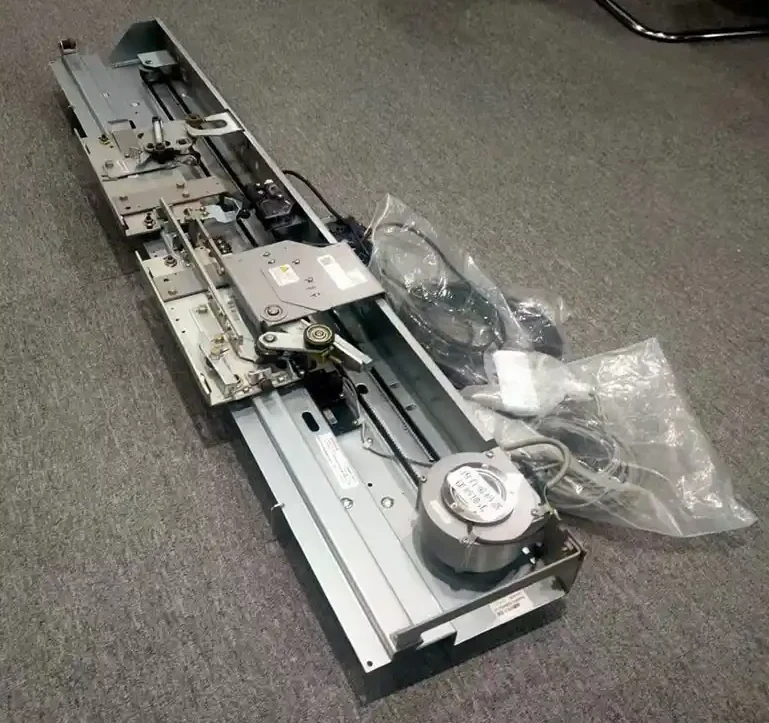
4.1 Common Causes of an Elevator Door Lock Failure
According to the supplied troubleshooting material, two mechanical conditions can prevent the landing lock from fully engaging:
1. Incorrect clearance
If the clearance between the contact bracket and the lock beak is too small, the components may rub against each other.
This can prevent the lock from reaching its complete locked position.
2. Stiff lock support shaft
If the main support shaft of the lock does not move freely, the lock may not return to its correct position.
The reference material recommends cleaning the support shaft and appropriately lubricating it, with periodic attention during maintenance.
Practical inspection
When an elevator cannot run after the landing door closes, do not immediately replace the controller or electrical board.
First check:
- Is the landing door fully closed?
- Is the lock mechanically engaged?
- Is the lock contact correctly switched?
- Is the lock mechanism moving freely?
- Is there excessive friction?
- Is the contact bracket correctly positioned?
- Is the lock beak correctly aligned?
This is a good example of why elevator maintenance requires both mechanical and electrical troubleshooting skills.
5. Door Clutch, Pickup Roller and Elevator Door Lock Adjustment
The interaction between the car door clutch/skate and the landing-door pickup rollers is particularly important.
When the elevator car arrives at a floor, the car-side door mechanism engages the landing door mechanism.
If the pickup rollers are incorrectly positioned, the landing door may:
- Close before the car door
- Close with impact
- Fail to open correctly
- Produce abnormal noise
- Damage the door coupling mechanism
The supplied troubleshooting document describes a case where door impact occurred only at a particular floor because the distance between the pickup roller and skate arm was incorrect.
For that specific door system, the document gives:
- Rear roller to skate arm: 7 mm
- Front roller to skate arm: 9 mm
These values are specific to the referenced door system and troubleshooting case. They should not be treated as universal elevator-door dimensions. Always follow the applicable manufacturer's installation manual for the actual equipment.
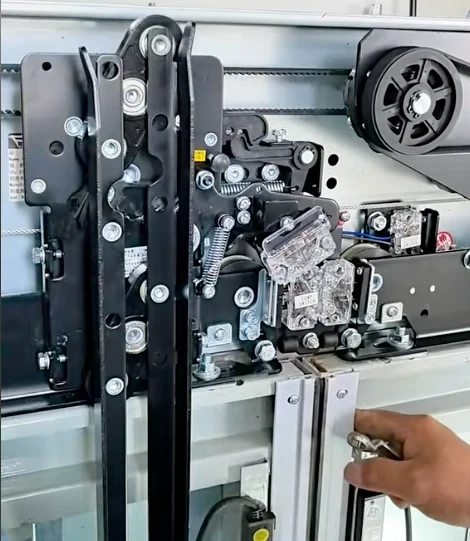
6. Why Does an Elevator Door Hit When Closing?
Door impact is a common commissioning problem.
Possible causes include:
Incorrect DIP switch or door-controller settings
An incorrect door-controller configuration can change the door operating behavior.
Incorrect pickup roller position
If the landing-door pickup roller does not correctly engage with the car-door clutch, the landing door and car door may not move together correctly.
Door panel gap problems
If the door panels are incorrectly positioned, they can interfere with each other during closing.
Excessive mechanical resistance
A dirty sill, incorrectly adjusted guide shoe, excessive roller pressure or excessive spring force can make the door movement abnormal.
Excessive belt or wire-rope tension
The troubleshooting material specifically identifies excessive belt or metal-cord tension as a possible source of increased door resistance.
Therefore, when a door hits during closing, technicians should not simply increase or decrease the door-controller parameters.
Check the mechanical system first.
7. Door Not Fully Opening: A Mechanical Troubleshooting Method
If an elevator landing door cannot reach the fully open position, use a systematic inspection process.
Step 1 — Check the door guide
Make sure the guide roller is not pressing excessively against the guide rail.
Step 2 — Check the sill
Clean the sill and inspect the groove.
Look for:
- Dirt
- Foreign objects
- Deformation
- Excessive friction
Step 3 — Check the door panel
Make sure the panel is correctly aligned.
Step 4 — Check the lower guide
The guide shoe should move smoothly in the sill.
Step 5 — Check the closing spring
An excessively strong closing spring can increase resistance.
Step 6 — Check the belt or metal cord
Excessive tension can increase resistance.
These inspection points are directly reflected in the supplied troubleshooting material.
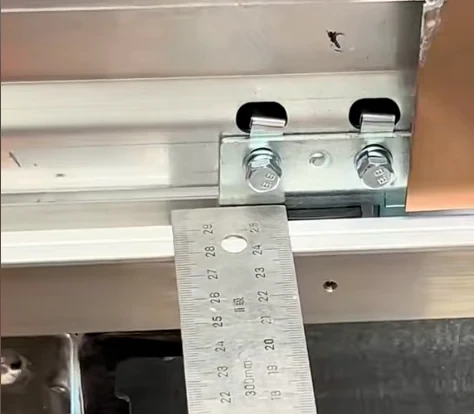
8. Door Panel and Sill Clearance
The relationship between the door panel and sill is particularly important.
If the panel is too close to the sill:
- Friction can increase
- The panel may rub against the sill
- Door movement can become noisy
- The door may fail to open completely
- The guide shoe may contact the bottom of the sill groove
The supplied troubleshooting example recommends a 5 mm panel-to-sill gap for that particular door system.
Again, this should be treated as a model-specific reference, not a universal elevator code requirement.
For actual installation, technicians should use the manufacturer's specified clearance.
9. Elevator Door Closing Spring
Some landing-door systems use a mechanical spring to assist door closing.
The spring must be correctly positioned and adjusted.
If the spring contacts:
- The contact bracket
- The hanger plate
- The door release rod
it may create friction and abnormal noise.
The troubleshooting material describes these three possible friction locations and recommends adjusting the spring's mounting position to maintain appropriate clearance.
Maintenance inspection
During routine maintenance, inspect:
- Spring mounting position
- Spring tension
- Contact with nearby components
- Door closing movement
- Abnormal noise
If the spring is too tight, it can also increase door operating resistance.
10. Elevator Door Operator and Landing Door Synchronization
The elevator door operator controls the movement of the car door, while the landing door is mechanically engaged through the door coupling system in many common configurations.
Synchronization is important.
A typical sequence is:
Door operator starts → clutch/skate engages → landing door lock releases → landing door follows car door → doors open → doors close → landing lock re-engages → safety circuit confirms lock → elevator can run
If one step does not occur correctly, the elevator may stop or generate a door-related fault.
For example, the supplied troubleshooting document describes a synchronous door system in which the skate must open sufficiently before the landing lock is released and the doors begin moving together.
11. Door Lock and Safety Circuit Testing
The mechanical lock and electrical contact must both operate correctly.
A door can look closed while the safety circuit remains open.
Therefore, final commissioning should verify:
- Door is physically closed.
- Door lock is mechanically engaged.
- Lock contact changes state correctly.
- Safety circuit is complete.
- Elevator controller recognizes the door as closed.
- Elevator can run normally.
The safety reference also emphasizes confirming the landing-door lock switch and brake function during controlled access procedures.
Important safety note
Never bypass or short the elevator door safety circuit as a substitute for correcting a defective door lock.
The safety manual explicitly states that landing and car doors must not be simultaneously shorted, and that approved temporary jumpers and documented procedures must be used when such work is authorized.
12. Electrical Installation of the Door Operator
Mechanical adjustment is only one part of door commissioning.
The door controller also requires correct electrical installation.
Potential problems include:
- Unstable power supply
- Incorrect wiring
- Poor grounding
- Signal interference
- Signal wires routed together with power wires
- Incorrect controller configuration
The supplied troubleshooting material describes a case where an unexpected door-opening action during closing was associated with signal interference. The recommendations included grounding the controller, separating signal and power wiring, and using shielded signal wiring.
13. Elevator Door Commissioning Procedure
After the landing doors have been installed, commissioning should proceed systematically.
Mechanical inspection
Check:
- Door frame
- Door sill
- Door panel
- Door hanger
- Door rollers
- Guide system
- Door lock
- Pickup rollers
- Closing spring
- Belt or wire rope
- Door panel clearances
Manual movement test
Move the door manually and observe:
- Resistance
- Smoothness
- Noise
- Alignment
- End position
If excessive resistance is present, correct the mechanical problem before relying on controller adjustment.
Electrical test
Check:
- Door operator power
- Controller status
- Input/output signals
- Door lock contact
- Safety circuit
- Open/close commands
- Photocell or light curtain where installed
Automatic operation test
Run several complete cycles:
Open → fully open → close → lock → reopen → close
Observe whether the door behaves consistently.
14. Common Elevator Door Problems and Solutions
| Problem | Possible Cause | Recommended Inspection |
|---|---|---|
| Door hits when closing | Pickup roller incorrectly adjusted | Check roller/skate relationship |
| Door does not fully open | Excessive mechanical resistance | Check roller, sill, guide, spring and belt |
| Elevator cannot run | Door lock not fully engaged | Check mechanical lock and lock contact |
| Door makes noise | Spring or hanger interference | Check clearances |
| Door rubs on sill | Incorrect panel alignment | Check panel and sill clearance |
| Door rebounds | Closing/locking adjustment issue | Check door controller and mechanical system |
| Door opens unexpectedly | Signal interference | Check grounding and signal wiring |
| Door does not move | Power/fuse/controller issue | Check power supply and controller status |
| One floor has door impact | Landing-door pickup adjustment | Compare the affected floor with other floors |
The supplied door troubleshooting document contains corresponding examples covering door impact, mechanical obstruction, lock failure, noise, signal interference and controller problems.
15. Elevator Door Installation Quality Checklist
Before handing over an elevator, technicians can use the following checklist.
Landing Door
- Door frame correctly installed
- Door sill securely fixed
- Door panel correctly aligned
- Door roller adjusted
- Door moves smoothly
- No abnormal friction
- No abnormal noise
- Door panel does not rub against sill
- Door lock mechanically engages
- Door lock contact operates correctly
- Pickup roller correctly adjusted
- Closing spring correctly positioned
- Belt/wire rope correctly tensioned
- Door operator wiring checked
- Safety circuit verified
- Complete automatic door cycle tested
16. Elevator Door Safety During Installation and Maintenance
Elevator door work involves an open shaft and potentially dangerous mechanical and electrical energy.
Before working, technicians must follow the applicable site safety procedures.
The supplied safety manual requires elevator equipment to be placed in a zero-energy state when the work does not require energized equipment, including proper lockout/tagout and verification with an appropriate meter.
When entering the shaft or pit, the safety procedure also requires proper door protection and confirmation of the elevator's condition.
This is particularly important when working around:
- Landing doors
- Door locks
- Door operators
- Door panels
- Elevator car doors
- Shaft openings
- Moving equipment
Safety procedures always take priority over troubleshooting speed.
17. Choosing Elevator Door Spare Parts
Correct replacement parts are important when repairing or maintaining an elevator door system.
Common elevator spare parts include:
- Elevator door locks
- Door rollers
- Pickup rollers
- Door guide shoes
- Door sills
- Door hangers
- Door belts
- Door controllers
- Door motors
- Door clutch/skate components
- Door sensors
- Door operator boards
When purchasing lift spare parts, always verify:
- Part number
- Door operator model
- Elevator model
- Door opening type
- Left/right configuration
- Manufacturer
- Voltage
- Mechanical dimensions
- Connector type
For maintenance companies, working with a reliable elevator parts supplier can reduce downtime and help ensure that replacement components match the original system.
18. Why Professional Elevator Testing Tools Matter
Correct door installation requires more than visual inspection.
Professional elevator testing tools can help technicians verify:
- Door lock contacts
- Power supply
- Control signals
- Continuity
- Insulation
- Door operating voltage
- Sensor signals
- Controller inputs and outputs
Typical tools may include:
- Digital multimeter
- Insulation tester
- Measuring gauge
- Mechanical clearance gauge
- Specialized door adjustment tools
- Manufacturer-specific diagnostic equipment
For example, the supplied troubleshooting material recommends using a dedicated adjustment tool for pickup roller adjustment in the referenced door system.
Frequently Asked Questions
What is the most common cause of an elevator landing door not opening completely?
Mechanical resistance is one important cause. The supplied troubleshooting material identifies roller pressure, sill friction, guide-shoe contact, excessive closing-spring force and excessive belt/metal-cord tension as possible causes.
Why does an elevator not run even though the door appears closed?
The landing-door lock may not be fully engaged or its electrical contact may not have switched. This leaves the safety circuit open.
What should I check when the elevator door hits during closing?
Check the pickup roller and door clutch/skate relationship, door-panel alignment, sill condition, mechanical resistance and controller settings. The affected landing should also be compared with floors where the door operates normally.
Why does the elevator door make a rubbing noise?
Possible causes include spring contact with nearby components, excessive roller pressure, sill friction, door-panel misalignment or other mechanical interference.
Is a 5 mm elevator door clearance universal?
No. The 5 mm value in the supplied troubleshooting material belongs to a specific door-system adjustment example. Actual clearance must follow the manufacturer's specification and applicable local requirements.
Conclusion
A reliable elevator landing door system depends on the correct installation and adjustment of many components—not just the door operator.
The door sill, door panel, door roller, door lock, pickup roller, closing spring and door operator must work together correctly.
When troubleshooting an elevator door problem, technicians should avoid immediately assuming that the controller or electronic board is defective. Mechanical resistance, incorrect clearances, door-lock alignment and pickup-roller adjustment can produce symptoms that appear to be electrical faults.
A systematic approach is therefore:
Check mechanical alignment → check movement resistance → check door lock → check pickup mechanism → check electrical signals → test complete door cycles.
For elevator maintenance companies and service technicians, keeping reliable elevator spare parts, professional elevator testing tools, and access to a dependable elevator parts supplier can make installation and troubleshooting significantly more efficient.
Note: The technical values and adjustment examples in this article are based on the supplied reference materials. They are not universal code requirements. For an actual installation, always follow the elevator manufacturer's current installation manual, applicable local elevator codes, inspection requirements and project specifications.