Introduction
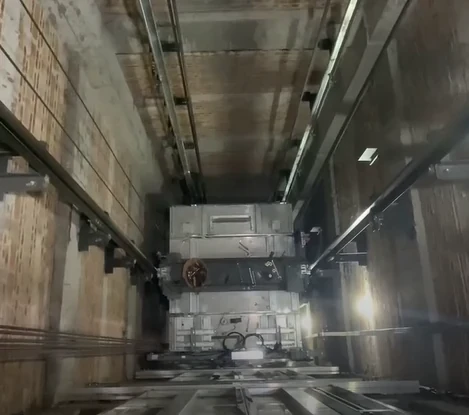
The elevator car and counterweight are two of the most important moving assemblies in a traction elevator.
The elevator car carries passengers or goods, while the counterweight balances a large portion of the car load and helps reduce the energy required by the traction system.
Both assemblies travel vertically inside the elevator shaft and are guided by guide rails.
This means that the installation quality of the:
- Elevator car frame
- Car platform
- Guide shoes
- Counterweight frame
- Counterweight guide shoes
- wire ropes
- Safety equipment
- Mechanical fasteners
has a direct effect on elevator operation.
The supplied technical and safety material places particular emphasis on controlling mechanical energy, securely supporting suspended cars and counterweights, using approved lifting equipment, and maintaining proper safety procedures during shaft work.
This article organizes those requirements into a practical technical guide for elevator installation technicians and maintenance professionals.
Important: Elevator installation and lifting work is high-risk work. The procedures and dimensions in this article should not replace the elevator manufacturer's installation manual, approved lifting plan, local regulations or site-specific safety procedures.
1. What Are the Elevator Car and Counterweight?
A conventional traction elevator uses a car and counterweight as part of the traction system.
Elevator Car
The elevator car consists of components such as:
- Car frame
- Car platform
- Car enclosure
- Car door
- Guide shoes
- Safety gear
- Electrical equipment
The car travels vertically along the car guide rails.
Counterweight
The counterweight assembly normally includes:
- Counterweight frame
- Counterweight blocks
- Guide shoes
- Rope connection
- Related mechanical components
The counterweight travels on separate guide rails.
The basic elevator structure in the technical material identifies the car, counterweight, guide rails, safety gear and wire rope as major components of the elevator system.
2. Why Elevator Car Installation Is Important
The elevator car must move smoothly and remain correctly positioned within the shaft.
Poor installation can result in:
- Car vibration
- Abnormal noise
- Uneven movement
- Guide shoe wear
- Door alignment problems
- Safety gear problems
- Increased mechanical stress
The installation should therefore focus on alignment rather than simply assembling the individual components.
A correctly installed car should maintain the designed relationship between:
Car frame → Guide shoes → Guide rails → Door system → Counterweight → Wire rope
3. Elevator Car Frame Installation
The car frame provides the main structural support for the elevator car.
It normally connects the:
- Car platform
- Guide shoes
- Safety gear
- Suspension/rope connection
- Other car components
During installation, technicians should verify:
Frame
- Correct model
- Correct orientation
- Correct fastening
- Structural condition
Platform
- Level
- Securely mounted
- Correct relationship with the frame
Guide Shoes
- Correct position
- Correct alignment
- Correct fastening
Safety Gear
- Correct installation
- Correct connection
- No interference
4. Elevator Car Platform Levelness
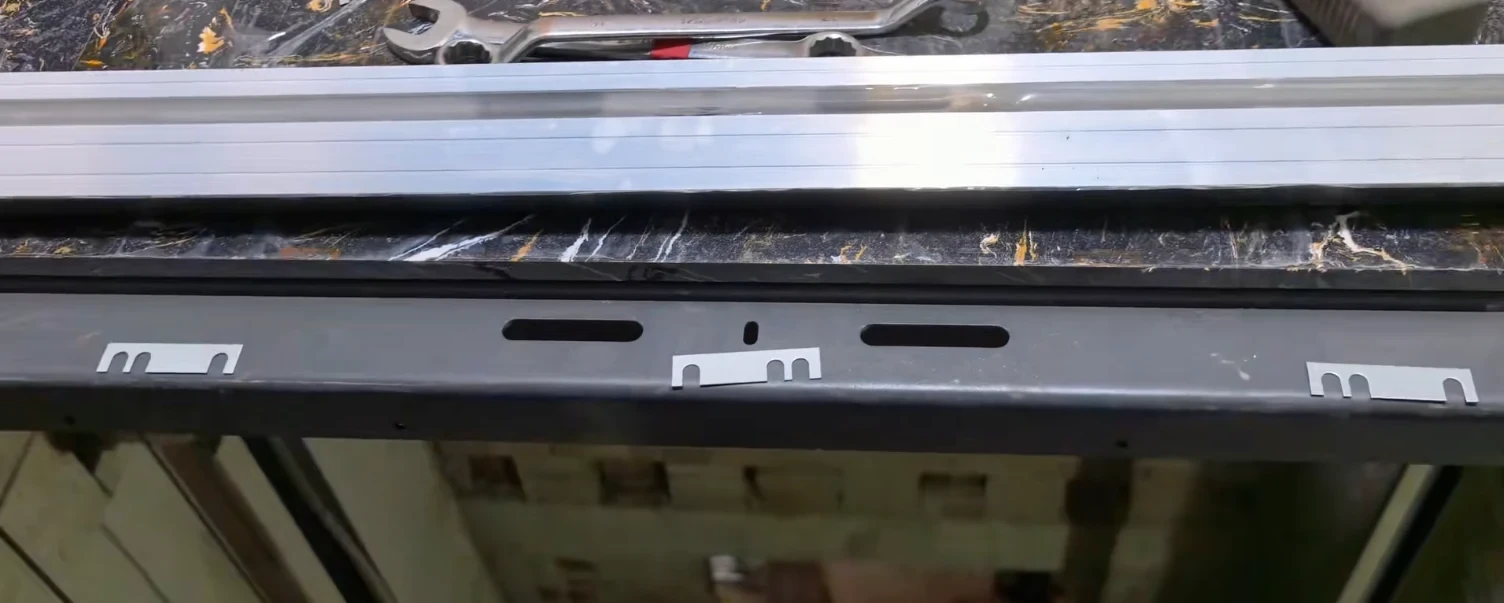
The car platform should be properly installed relative to the car frame.
Incorrect installation may cause:
- Uneven floor
- Door sill misalignment
- Car vibration
- Poor ride comfort
- Door opening problems
Before installing the complete car enclosure, technicians should verify the basic mechanical alignment.
5. Elevator Guide Shoes
The elevator guide shoe is an important mechanical component that connects the moving car to the guide rail system.
The guide shoe allows the car to travel along the guide rail while controlling lateral movement.
Depending on the elevator design, guide shoes may be:
- Sliding guide shoes
- Roller guide shoes
The correct type must always be selected according to the elevator manufacturer's design.
6. Guide Shoe Installation
When installing a guide shoe, check:
- Correct guide shoe model
- Mounting position
- Fastening bolts
- Alignment with guide rail
- Contact condition
- Wear condition
- Lubrication requirements, if applicable
The guide shoe should not be installed in a way that creates excessive pressure against the guide rail.
Excessive friction can increase running resistance.
7. Guide Shoe and Guide Rail Relationship
The guide shoe and guide rail should be considered as one mechanical system.
A problem with the guide rail may appear as a guide-shoe problem.
For example:
Guide rail misalignment
↓
Guide shoe receives abnormal force
↓
Increased friction
↓
Vibration / noise
↓
Premature guide shoe wear
Therefore, when troubleshooting a guide shoe, technicians should inspect the guide rail as well.
8. Elevator Counterweight Installation
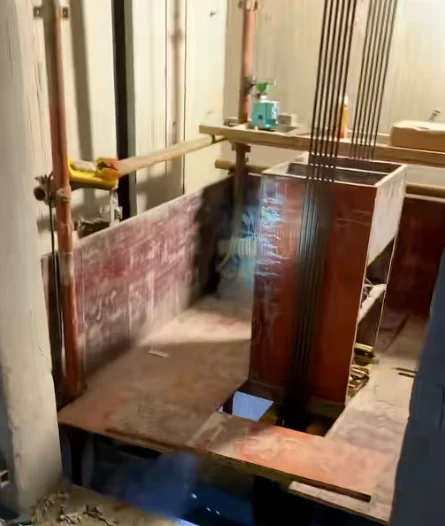
The counterweight is installed inside the shaft and travels vertically on its own guide rails.
The counterweight must be installed correctly relative to:
- Counterweight guide rails
- Wire ropes
- Traction system
- Shaft structure
- Buffers
- Other moving components
The counterweight should move smoothly without contacting surrounding structures.
9. Counterweight Blocks
Counterweight blocks must be installed according to the elevator design.
Technicians should verify:
- Number of blocks
- Correct block type
- Correct arrangement
- Secure positioning
- Retaining components
- Frame condition
Never assume that the number or weight of counterweight blocks can be changed without reference to the elevator design.
10. Counterweight Guide Shoes
The counterweight also uses guide shoes.
These guide shoes should be inspected for:
- Correct model
- Correct installation
- Alignment
- Wear
- Secure fastening
- Proper contact with the guide rail
The same principle applies here:
Guide shoe condition cannot be separated from guide rail condition.
11. Securing a Suspended Elevator Car or Counterweight
This is one of the most important safety points in the supplied document.
When an elevator car or counterweight is suspended during work, it must be mechanically secured against unexpected movement.
The safety reference requires at least two independent means of securing the elevator car/counterweight, such as two chain hoists, slings or supports. Each securing method should independently be capable of supporting the elevator's weight, providing safety redundancy.
This principle is critical.
Do not rely on only one support.
If one supporting device fails, a second independent method should still be capable of controlling the load.
12. Elevator Lifting Equipment
Installation may require:
- Chain hoist
- Manual hoist
- Electric hoist
- Slings
- Shackles
- Approved lifting points
- Supporting structures
The supplied safety manual requires lifting equipment to be certified and inspected, and requires technicians involved in lifting operations to understand the applicable lifting procedures.
Before lifting, technicians should confirm:
- Load weight
- Lifting-point capacity
- Equipment capacity
- Certification status
- Sling condition
- Hook condition
- Connection method
- Lifting plan
13. Never Guess the Load Weight
One of the most important lifting rules is to know the weight of the load being lifted.
The supplied safety reference explicitly states that technicians must know the weight of the load and must not connect lifting equipment where the strength of the lifting point is unknown.
Therefore:
Known load weight + certified equipment + known lifting points
should be established before lifting.
14. Elevator Rigging Inspection
Before using lifting equipment, inspect for:
- Wear
- Cuts
- Cracks
- Broken components
- Heat damage
- Damaged chains
- Damaged ropes
- Missing capacity labels
- Expired certification
The supplied material specifically requires visual inspection of rigging equipment before use.
Damaged or expired lifting equipment should not be used.
15. Do Not Work Under a Suspended Elevator Car
The supplied safety reference explicitly prohibits working under suspended heavy loads.
This is particularly important during elevator installation because the car frame can represent a substantial suspended load.
The working area should therefore be controlled so that personnel are not exposed to unnecessary suspended-load hazards.
16. Elevator Car and Counterweight Mechanical Energy
An elevator car and counterweight can contain significant mechanical energy.
The safety manual states that equipment should be placed in a zero mechanical-energy condition where required and secured to prevent unexpected movement.
Examples include work involving:
- Elevator car
- Counterweight
- Wire rope
- Traction equipment
- Hydraulic systems
- Other suspended equipment
This is why mechanical securing is not optional when required by the work procedure.
17. Guide Rail and Guide Shoe Alignment
After the car is installed, technicians should check the relationship between:
- Car frame
- Guide shoes
- Guide rails
The guide shoe should remain correctly engaged with the guide rail without excessive mechanical pressure.
The technician should look for:
- Abnormal contact
- Excessive friction
- Loose mounting
- Uneven wear
- Damaged surfaces
- Incorrect alignment
18. Elevator Car Movement Test
Before normal operation, the car should be moved under the appropriate inspection/commissioning procedure.
The technician should observe:
- Smooth upward movement
- Smooth downward movement
- Guide shoe behavior
- Abnormal noise
- Vibration
- Cable movement
- Door equipment
- Safety circuit behavior
Any abnormal mechanical condition should be investigated before continuing.
19. Elevator Car Top Safety
The car top is a working area for elevator technicians.
Before entering or working on the car top, the supplied safety procedure requires verification of the relevant safety circuit and inspection controls. The procedure includes checking the brake and landing-door lock condition, testing the car-top emergency stop and inspection controls, and confirming that the inspection controls operate correctly before work begins.
This is particularly important because the car top is inside the moving elevator shaft.
20. Car Top Working Platform
When a technician is working on the car top, the work area should provide:
- Adequate standing space
- Appropriate lighting
- Fall protection where required
- Safe access
- Functional emergency stop
- Functional inspection controls
The technician should never assume that the car-top controls are working correctly without testing them according to the approved procedure.
21. Elevator Car and Landing Door Alignment
The elevator car must be correctly aligned with the landing door system.
Important areas include:
- Car sill
- Landing sill
- Door panels
- Door operator
- Door lock
- Door coupling mechanism
A mechanical alignment problem may later appear as a door fault.
For example:
Car position incorrect
↓
Car sill and landing sill relationship changes
↓
Door clearance changes
↓
Door movement becomes abnormal
Therefore, car installation should be completed before final door adjustment.
22. Elevator Car Door and Guide Shoe
The car door uses guide components to control the door panel.
A technical troubleshooting document supplied with the project describes cases where excessive resistance was caused by problems such as guide shoe/sill friction, the guide shoe contacting the bottom of the sill, or excessive belt/rope tension.
This is a useful reminder:
Not every elevator door problem is caused by the door controller.
Mechanical resistance should always be considered first.
23. Elevator Door Sill and Guide Shoe Clearance
The supplied troubleshooting material describes a case where insufficient clearance between the door panel and sill caused the door to become blocked when passengers were concentrated near the entrance.
The reference case found approximately 1 mm clearance and recommended adjusting the door panel height to achieve a 5 mm clearance for that specific door system.
This is a model-specific reference from the supplied troubleshooting document, not a universal elevator-door clearance specification.
Always follow the actual door manufacturer's installation manual.
24. Elevator Counterweight Safety
The counterweight must be controlled carefully during installation and maintenance.
The safety reference states that the counterweight should be supported using an approved supporting device when required.
Technicians should never improvise a support system.
An improvised support may not have sufficient:
- Load capacity
- Stability
- Mechanical strength
- Safety factor
25. Wire Rope Connection
Once the car and counterweight are installed, the wire rope system must be correctly connected.
Check:
- Rope routing
- Rope ends
- Rope sockets or approved termination
- Equalization
- Rope tension
- Traction sheave alignment
- Counterweight connection
- Car connection
The exact rope termination method depends on the elevator design.
26. Wire Rope Tension
Unequal rope tension can contribute to mechanical problems.
Possible symptoms include:
- Uneven loading
- Abnormal vibration
- Rope noise
- Sheave wear
- Uneven car movement
After installation, rope tension should be checked using the manufacturer's approved method.
Do not adjust rope tension based only on visual appearance.
27. Elevator Car Safety Gear
The elevator car normally incorporates a safety gear system connected to the guide rails.
The safety gear is a critical safety component and should be installed according to the elevator manufacturer's instructions.
Check:
- Correct safety gear model
- Correct mounting
- Correct connection
- Trigger mechanism
- Clearances
- Guide rail relationship
Testing should only be performed according to the approved procedure.
28. Elevator Car Electrical Components
The car assembly may also contain electrical components such as:
- Car operating panel
- Door controls
- Lighting
- Alarm equipment
- Communication equipment
- Sensors
- Inspection controls
- Safety switches
These components need correct wiring and secure connections.
Electrical cables should not interfere with moving mechanical components.
29. Elevator Traveling Cable
The traveling cable connects the moving elevator car with stationary equipment.
Because it moves continuously during elevator operation, it needs correct routing and support.
The cable should be checked for:
- Correct length
- Correct attachment
- Proper bend
- Adequate clearance
- No rubbing
- No sharp edges
- No interference with counterweight or shaft equipment
Improper traveling-cable installation can eventually cause intermittent electrical faults.
30. Elevator Car Installation and Ride Quality
Ride quality depends on many factors.
Important factors include:
- Guide rail alignment
- Guide shoe condition
- Car frame alignment
- Rope tension
- Traction machine condition
- Door equipment
- Mechanical clearances
Therefore, if a newly installed elevator has vibration, technicians should not immediately replace an electronic elevator spare part.
Mechanical inspection should come first.
31. Common Elevator Car Installation Problems
Problem 1 — Guide Shoe Too Tight
Possible result:
- Excessive friction
- Noise
- Heating
- Premature wear
Problem 2 — Guide Rail Misalignment
Possible result:
- Car vibration
- Uneven movement
- Guide shoe wear
Problem 3 — Car Frame Not Properly Aligned
Possible result:
- Door alignment problems
- Uneven loading
- Poor ride comfort
Problem 4 — Counterweight Interference
Possible result:
- Abnormal noise
- Mechanical contact
- Safety concerns
Problem 5 — Incorrect Rope Tension
Possible result:
- Uneven load distribution
- Vibration
- Mechanical wear
32. Elevator Car Installation Inspection Checklist
Car Frame
- Correct model
- Correct orientation
- Fasteners secure
- Frame structurally sound
Platform
- Level
- Secure
- Correctly aligned
Guide Shoes
- Correct type
- Correct position
- Secure
- Correct contact with guide rail
- No abnormal friction
Safety Gear
- Correct installation
- Correct connection
- No interference
Counterweight
- Frame secure
- Blocks correctly installed
- Guide shoes checked
- No interference
Wire Rope
- Correct routing
- Correct termination
- Tension checked
- No visible damage
33. Elevator Car Top Inspection Checklist
Before working on the car top:
- Elevator placed under approved inspection condition
- Safety circuit checked
- Emergency stop checked
- Inspection controls checked
- Adequate lighting available
- Fall protection used where required
- Safe standing area available
- Shaft access controlled
The supplied safety procedure specifically calls for checking the car-top emergency stop and inspection controls before work begins.
34. Elevator Counterweight Installation Checklist
- Counterweight frame inspected
- Counterweight blocks correct
- Retaining components secure
- Guide shoes installed
- Guide rail clearance checked
- Wire rope connection checked
- Buffer relationship checked
- No interference during movement
35. Lifting and Rigging Checklist
Before lifting an elevator car or counterweight:
- Load weight confirmed
- Lifting plan completed
- Lifting points verified
- Hoist certification valid
- Sling certification valid
- Shackles inspected
- Capacity labels visible
- No damaged equipment
- Working area controlled
- No person under suspended load
The supplied safety material emphasizes certified lifting equipment, inspection before use, knowing the load weight and avoiding work under suspended loads.
36. Elevator Installation Tools
Typical installation and inspection work may require:
- Measuring tape
- Laser distance meter
- Level
- Alignment tools
- Torque wrench
- Multimeter
- Insulation tester
- Clamp meter
- Mechanical hand tools
- Approved lifting equipment
For commissioning and troubleshooting, appropriate elevator testing tools should be selected according to the elevator manufacturer's procedure.
37. Elevator Spare Parts Related to the Car and Counterweight
Several components in the car and counterweight system may eventually need replacement.
Examples include:
- Guide shoe
- Roller guide shoe
- Sliding guide shoe
- Safety switch
- Door components
- Door rollers
- Car-top components
- Traveling cable
- Sensors
- Mechanical fasteners
- Counterweight guide components
When purchasing an elevator spare part, always verify:
- Elevator manufacturer
- Elevator model
- Component model
- Part number
- Technical specification
- Mechanical dimensions
- Electrical specification where applicable
38. How to Choose an Elevator Parts Supplier
For critical elevator components, the supplier should be able to provide more than a product photograph.
A professional elevator parts supplier should ideally provide:
- Accurate part numbers
- Product specifications
- Compatibility information
- Technical support
- Replacement guidance
- Testing information where applicable
This is especially important for components that affect elevator safety or control.
39. Elevator Car Installation and Maintenance
The quality of installation directly affects future maintenance.
For example:
Correct guide shoe installation
→ less abnormal friction
→ lower wear
→ easier maintenance
Similarly:
Correct wire-rope installation
→ better traction performance
→ reduced mechanical problems
And:
Correct car alignment
→ better door alignment
→ fewer door-related problems
Good installation is therefore an investment in the elevator's future service life.
40. Final Commissioning Inspection
Before the elevator is released for normal operation, technicians should perform the required commissioning checks.
The inspection should cover:
Mechanical
- Car movement
- Counterweight movement
- Guide shoes
- Guide rails
- Wire ropes
- Safety gear
- Buffers
Door System
- Car door
- Landing doors
- Door locks
- Door sills
- Door operation
Electrical
- Safety circuit
- Traveling cable
- Sensors
- Inspection controls
- Communication
Safety
- Emergency stop
- Safety devices
- Overspeed-related systems
- Pit protection
- Car-top protection
Documentation
- Installation records
- Test records
- Inspection records
- Equipment certificates
Frequently Asked Questions
What is an elevator guide shoe?
An elevator guide shoe is a mechanical component that guides the elevator car or counterweight along its guide rail.
Why does an elevator need a counterweight?
The counterweight balances part of the elevator car load and helps reduce the traction force and energy required by the elevator system.
How many supports should be used when securing a suspended elevator car?
The supplied safety reference requires at least two independent securing methods when securing a suspended elevator car or counterweight, with each method capable of independently supporting the load.
Can a damaged lifting sling be used temporarily?
No. The supplied safety material requires lifting equipment and rigging to be inspected before use and prohibits the use of damaged equipment.
Why does an elevator car vibrate after installation?
Possible causes include guide rail alignment, guide shoe adjustment, car-frame alignment, rope tension or other mechanical conditions. Electronic components should not be replaced before basic mechanical causes are investigated.
Can I replace an elevator guide shoe with another model?
Only if the replacement is confirmed to be compatible with the specific elevator system. Check the manufacturer's specifications and exact part number before replacement.
What tools are useful for elevator car installation?
Depending on the installation procedure, technicians may use alignment tools, levels, torque tools, measuring equipment, electrical meters and certified lifting equipment.
Conclusion
The elevator car and counterweight are fundamental parts of a traction elevator.
Successful installation requires more than simply assembling the car frame and counterweight. The complete mechanical relationship between the:
Car → Guide Shoe → Guide Rail → Counterweight → Wire Rope → Traction System
must be correct.
Particular attention should be paid to:
- Car-frame alignment
- Platform levelness
- Guide shoe installation
- Guide rail alignment
- Counterweight installation
- Wire-rope connection
- Mechanical clearances
- Safety gear
- Car-top safety
- Lifting and rigging
The supplied safety material is especially clear on one critical point: a suspended elevator car or counterweight must be secured using independent supporting methods, and certified lifting equipment must be inspected before use.
For elevator technicians, this is also important from a maintenance perspective. Problems with guide shoes, guide rails, wire ropes and door components can often be traced back to installation quality or mechanical adjustment.
When replacement components are required, always verify the exact model and part number before purchasing an elevator spare part.
Reliable lift spare parts and appropriate elevator testing tools can help maintenance teams reduce downtime, but correct diagnosis and installation remain essential.